Tuesday, November 30, 2010

elmo birthday party tutorial 3: party favors

i wanted to be a good hostess and have little presents for addison's little friends. actually, my mom asked me what i was going to give them 2 days before the party and i had no idea. so she helped me throw something together, and it ended up being super cute!

i put an elmo place mat (i think they were $1 from walmart), a mini thing of goldfish crackers (since elmo has a goldfish), a picture frame, and a cookie.

by this time, i was really into cutting stuff out. i was getting good at it. call me crazy, but i decided to cut out even more stuff.

the only thing i made to go in the bag was an elmo picture frame (go figure). but i made a big elmo to go on the outside of the bag and i cut each child's name out and glued it to the bag.

what you'll need for the frame:
extra elmos you made for the cupcake toppers. hope you made extras! if not, whip up a few more.
blue poster board
plastic picture frame (not sure where they came from, but i'm assuming they're super cheap)
tape
ruler
pencil

i measure the picture frame (i think it was 5x7) onto the poster board and cut it out. then i used a ruler and made about a 1 inch boarder (i didn't do it perfectly. i just used the ruler for a straight line). then i cut the inside out.

next, i put the elmo in the top left corner (he can go anywhere, though). i made sure none of him would be hanging out of the frame. then i taped it. taping is much much easier than gluing. and then i put that in the frame! cute, huh?


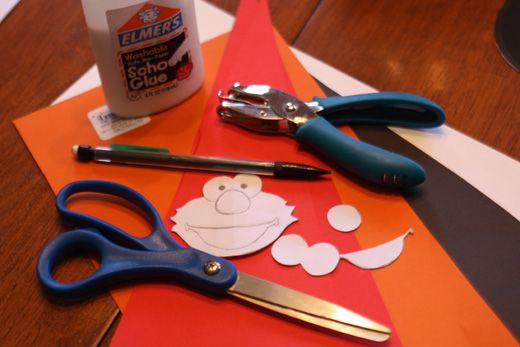
what you'll need for the bag decorations:
scrapbook paper (i used what was left from the birthday banner and cupcake toppers. red, white, black, orange, pink, and blue)
gift bags (i used blue and white)
elmo stencil
letters for each child's name (done like the birthday banner letters, just much smaller. makes it kind of harder to cut out, but you could just write their name on the bag or trace the letters and color them in)
glue
pencil
scissors
elmer's glue
tooth pick(s).

for the bag itself, i used just a plain bag (2 blue-for the boys, 1 white-for the girl). i took the elmo stencil from the cupcake topper and just made it bigger. it took a few tries, but i finally got it right.

after that, i printed off letters for each child's name and cut those out. then i traced them onto scrapbook paper (backwards, of course). i used pink for the girl's name and red for the boy's name.

i glued it all on the bag (i used a tooth pick for the letters), and then loaded them up!


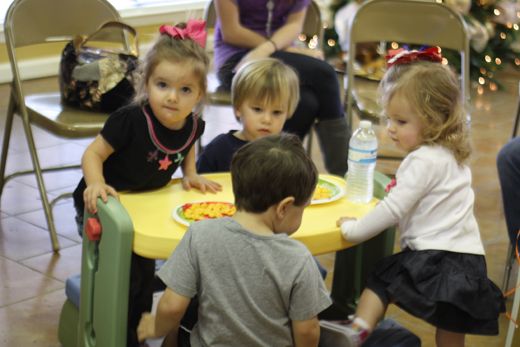
here they are at the party...


i thought they ended up being really cute! i was quite proud of myself :)

Monday, November 29, 2010

driving the bug

addison has gotten a little better at driving since her birthday, but not much. it's been kind of chilly lately, so we haven't gotten out much for her to ride around. we were able to twice this past week, so i think that's pretty good.

we just stick her out in the side driveway and turn the steering wheel hard and she just does donuts. she doesn't seem to mind. she occasionally goes off into the grass, but we get her out real quick.


she definitely loves driving her car! next thing i know, she'll be getting her learners permit. sigh.

Saturday, November 27, 2010

elmo birthday party tutorial 2: cupcake toppers

i'm definitely a procrastinator. i waited until the last minute to figure out the whole cake situation. we went to a few different cake places to see what they could make and find out prices. and they are expensive! and not that cute either.

so i was searching on etsy one night for elmo ideas and came across elmo cupcake toppers. and i thought hey, i could totally make those! so i did! it took some time, but it was worth it! i also made number 2 toppers because i thought those would be cute too, and they were. not as cute as elmo though! the ones i saw on etsy were made with cutting machines (a cricut or something like that), so they looked a little nicer and cleaner cut. but i think mine turned out just fine.

what you'll need:
scrapbook paper (i used the leftovers from the birthday banner. you'll need red, white, black, and orange, and for the 2's i used pink and blue)
elmo stencil (i made one)
number 2 stencil (i made it just like i made the letter stencils for the birthday banner. i just made it smaller)
pencil
scissors
elmer's glue
sucker sticks (you can get them at a craft store)
hole puncher
tooth pick(s)


we'll start with elmo. i made my own stencil, but here's a picture of it. you may be able to print it and cut it out and have it work for you. i cut out the whole thing and then traced the eyes, nose, and mouth onto another piece of paper. i made the nose a little more oval shaped than the stencil and i also made the sides of the mouth a little thicker because it was easier to cut out. you can adjust it a bit to suit your liking!


now comes a lot of tracing and cutting (remember, flip it over so the pencil marks are on the back side. for elmo, it's not that big of a deal because it's pretty symmetrical). i honestly don't know how many elmos i made. it was a lot though. i made extras just in case i needed them for something else. i just traced a whole bunch and then sat and cut them all out.

to glue, i did it in this order: eyes, nose, mouth, eyeballs. i put a little dab of glue on elmos head and smeared it around with a tooth pick for the eyes, and for everything else i put some glue on the part itself because all of it needed to be glued down (the top part of the eyes hang off so you can't put glue all over the eyes). i glued all the eyes on, then all the noses, and so on. it was a little easier that way. to make the eyeballs, i just used the hole puncher and used the black scrapbook paper. easy peasy.

lastly, i glued the sucker sticks to the back. not too bad, and really cute!!


that's just a portion of the elmos i made. i wish i had taken a picture of them all. oh well.


now on to the 2's. much easier, actually. just cut your stencil and trace it (flip it so the pencil marks will be on the back (are you getting tired of me saying that??)). then cut and glue the sucker stick to the back. not bad at all!

the finished products.


hope this was helpful! let me know if you have any questions! have fun :)

Friday, November 26, 2010

it's that time of the year!

it's christmas time! what do you think of the new christmas look? i just love christmas!! i was so excited to put my christmas design up :)

i had planned on getting up kind of early and going to gap (i was get there when they opened at 6). but that didn't exactly happen. i hopped out of bed around 8 and headed over there. i was ready for it to be crowded, but it wasn't crowded at all. i got a lot of stuff, and saved a lot of money! everything was really cheap until 10 (most of the things i got were at least 40% off). i even had a coupon for an extra 15% off!

i went to gymboree and children's place after that, but didn't get anything. i've been on the hunt for some black boots and found some i was going to order on macy's website, but when i went to order them they didn't have my size in the pair i wanted. boo. so i went to rack room while i was out and tried on a pair but they wouldn't fit over my cankles. tragic, right? my mom said we could venture to the mall once i got home, so we did. it really wasn't that bad. but it was 10 by the time we got there. i tried on a pair of boots there (the ones i was going to order) and they wouldn't fit over my cankles either. glad i didn't order them!!

so i'm still on the hunt for boots! i think today was pretty successful. i even ordered my mom's christmas present. it was on sale, too.

now off to do some homework and decorate for christmas.

have you started decorating yet?

Thursday, November 25, 2010

happy thanksgiving!

happy thanksgiving! i hope everyone is having a wonderful day :)

it's been in the 70's here today, which is very warm for late november. but it's about to storm and the high tomorrow is 41. that's more like it!

i've already had 1 thanksgiving meal and i'm going to head out soon for another! i'm sure i'll sleep good tonight!

i hope everyone has a great day!!

Wednesday, November 24, 2010

elmo birthday party tutorial 1: birthday banner

i don't have any pictures of my progress while doing this, but i'll do my best to explain! and if you have any questions after, comment or email me and i'll help. it really is easy though!

what you'll need:
scrapbook paper (i got mine from joann's. it was on sale 5 for $.99. i got about 3-4 letters per page, and needed a page for each letter for the flag/triangle part)
letters (more on that later)
pencil
scissors
a ruler
elmer's glue
hole puncher
tulle, string, or ribbon


what you'll do first is print the letters. i used american typewriter font. i made the letters in photoshop so i could make them thicker, but you could just make them in word and bold them (or leave them the way they are. either works). you could use approx. 550 pt. font if you use the american typewriter font. i wouldn't do any bigger because i don't think bigger would fit on the triangle for the banner.

print all of your letters out and cut them out. after you have your letters for the template cut out, you trace it onto the scrapbook paper (tip: flip it over so you trace it backwards so no pencil marks will be on the front). i alternated the colors of the letters (i used blue, red, and polka dot), but you could do them all in the same color or have each word in a different color. whatever you want. it all works!

once all of your letters are cut out, you can cut the triangles. i used a ruler and measure the middle of the paper on the bottom, then just drew a line down to it from the top 2 corners. it ended up being the perfect size. i cut an equal number of each color of the triangles (i used blue, red, and pink). somehow i messed up the letter pattern, but i didn't really care. it still looked cute!

i laid out everything to see what looked good, and ended up with this. (sorry about the quality. i took the picture with my phone).


then i took a picture of that to make sure i wouldn't forget. because i knew i would end up forgetting and mess it up otherwise. i sat down in front of the tv with the picture in front of me and glued! it didn't take too long. i looked at the letter i had previously glued to make sure they were in about the same place.

after that, i punched holes in the corners to string the tulle (or ribbon or string or whatever you decide to use) through. i cut a little piece and used it as a guide so i could know exactly where to punch the holes in the corners. once i was done with that, i strung tulle through it. my mom had a spool of it, so it made it super easy. you could even tie bows or knots at each hole, but i didn't really feel like doing that.

i left a lot of extra tulle on both ends just in case i needed to have it spaced a little differently. i had planned on having "happy birthday" on one line and "addison" on another, but my mom told me to do them all separately and i could tie "happy" and "birthday" together if i wanted to. i'm glad i did them separate because there wasn't enough room for "happy birthday" to be across, so i put each word on top of the other.


have fun! i'd love to see any pictures if you make it!

come back for more tutorials this weekend and next week!

wee bit wednesdays


{one} what kind of camera do you have?
canon rebel xsi. i love it. it's actually my dad's, but i've borrowed it (pretty much permanently). i got a 50mm f/1.8 lens for it and it's amazing.

{two} you just won $1000 and you have to spend it on yourself on one item. what do you buy?
the biggest louis vuitton i could buy. how fabulous would that be??

{three} if you had to choose, would you rather live with your parents in the same house forever or 5000 miles away?
definitely in the same house. i don't ever want to move far away.

{four} is your christmas tree up yet?
nope. i don't put it up until the friday after thanksgiving (which is this friday! yay!). i know of a bunch of people who have already put theirs up, but i think anything before thanksgiving is too early. that's just me though!

{five} do you bring reusable bags to the grocery store?
i try to. i sometimes forget them though. i need to just leave them in my car. they make carrying groceries a whole lot easier.

{six} which would be worse: listening to the same song on replay for the rest of your life or having to eat the same meal everyday for the rest of your life?
eating the same meal. i'm don't eat a big variety of food, but i don't like to eat the same thing over and over. whenever i find a song i like, i leave it on replay for a while so that wouldn't really bother me.

{seven} name 3 things you are thankful for this season.
my family, my friends, and my sanity (for now)

{eight} do you dye/highlight your hair? if so, do you do it yourself or have it done at the salon?
i dye my hair darker sometimes, but i do it myself. i very rarely go to a salon to have that done. it's much cheaper to do it myself. i love going to get my hair cut though. having my hair washed it so relaxing.

{nine} would you rather watch a movie at home or at the theater?
probably at home. i like going to the movie theater sometimes, but it's expensive. i'd rather just sit at home in comfy clothes and lounge and watch a movie.

{ten} would you rather win $1000/week for life or $5 million all at once?
$1000 a week. ahhh that would be so nice.

stop back by later for a tutorial on how to make a birthday banner like the one i made for addison's birthday party!

Tuesday, November 23, 2010

birthday invitations

i realized last night that i completely forgot to post a picture of the birthday party invitations.

i made them myself and had them printed at the ups store. it was really cheap, and fairly easy. i wanted to use some elmo like colors, but still make it girly. i used the pink, red, and blue from the invitation in the decorations.


i thought they turned out pretty cute! especially for my first.

i'll post tutorials the rest of the week. stay tuned!

Monday, November 22, 2010

addison's elmo party

let me just say this. throwing a party is exhausting. and this is only addison's 2nd party. i have many years of party throwing ahead of me.

it was pretty perfect though! everything went really well. lots of people came. addison had lots of fun.

my mom and i made almost everything at the party. at least decoration wise. i made the cupcake topper, the decorations on the gift bags, picture frames for the gift bags, the birthday banner, and my mom made her shirt and bow. we opted out of making cupcakes and let publix do that. and it was really cheap too! i found a cute idea to make cupcake toppers, so i did that instead of spending a fortune on an expensive cake or decorated cupcakes. my mom also got lots of cookies (she had a gift card that she needed to use, so we used it!). we had some snacks, and that was that. i'm sure the food was good, but i was running around the whole time and didn't have a chance to eat any of it. it happens.


i just had to throw in a picture of baby jackson's snot bubble. it was SO funny! he's such a cutie.


addison got her first car for her birthday. it's so cute. there were a lot of barbie stickers to put on it, but i decided not to put those one. they weren't that cute. i figure we can decorate it ourselves.


she's not the best driver. but it takes practice, right? she would just sit back and push the gas. she wouldn't hold on to the steering wheel or anything. and she closed her eyes some. we need to give her some driving lessons.


addison definitely racked up! she got a lot of really great gifts. can't wait to play with them too :)

i'll be posting some tutorials on how to make the cupcake toppers, the picture frames, the birthday banner, and the shirt. it involves a lot of cutting, so be ready!! i became a pro with the scissors!